

Readers, I purchased Ryuichiro Shimazaki's book of men's military coat patterns (above) back in 2014 and, while I would page through it from time to time, I never actually sewed with it -- until this year!
In January I decided I'd give one of these patterns a try. I don't remember how I came to this decision--I had already made my mind up that I wasn't going to make myself a new coat this winter. So much for that decision. I chose the classic N3-B parka, which is fully lined and interlined and has a deep, fur-trimmed hood.
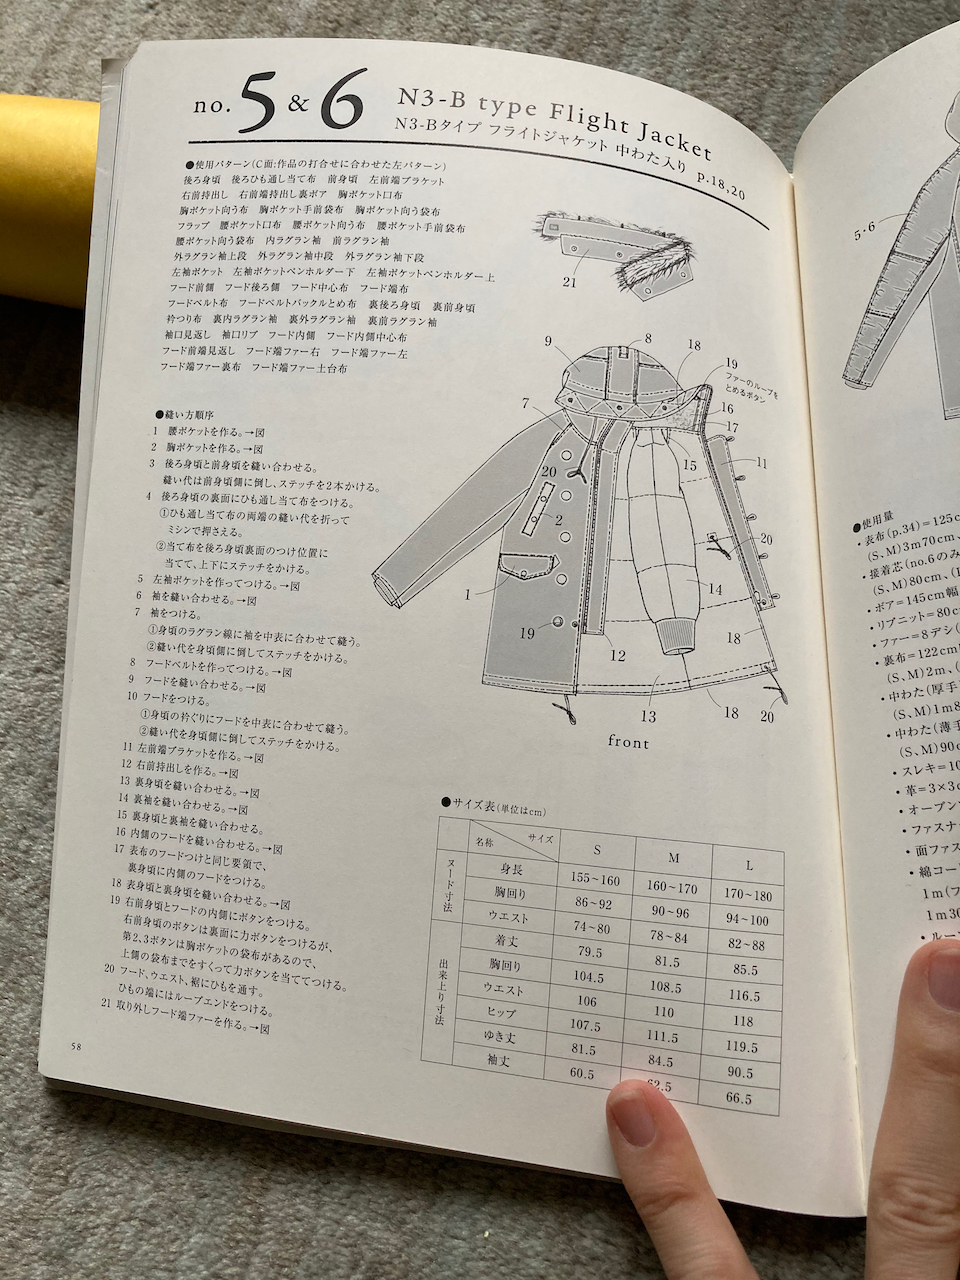
I won't lie: this is a complicated pattern, especially since I don't speak Japanese. I would need to follow the diagrams, which, to their credit, are extremely detailed. I've been told there are now Apps that allow you to scan a foreign language and have it translated. I never did explore that option but it likely could have saved me a LOT of time.
Just to make things even more complicated, I decided to make this parka using a double-faced nylon taffeta panel print I picked up at Mood Fabrics about four or five years ago. It's design is completely woven, not printed, so perhaps it's also a brocade--anybody know? The reverse side is the mirror image of what you see: the white sections are black, the black sections white.


I decided to place the panel vertically. The pattern goes from white to black (and then black to white) from side to side (as below).

Choosing the fabric was the easy part. The difficult part was tracing my pattern off the mind-numbingly complex pattern sheet, where all the sizes are all nested together and everything overlaps everything else -- and it's all one color.

Having to trace all the pattern pieces, none of which are individually numbered, and add seam allowances to each piece is bad enough. What made matters worse was that I had to do this TWICE. I just assumed I'd be a size Medium (the pattern is S, M, L only), since I've generally been a size Medium in other Japanese pattern books I've used, such as "Men's Clothes for All Seasons."
I traced, added seam allowances, and made the Medium-size muslin.

It fit, but it fit more like a rain slicker than a lined winter coat. There was no way I was going to be able to get a lining inside this pattern size, not to mention an interlining too. So I had to go back to the pattern and trace the size Large. Then I made a muslin of that. The Large felt much, much better.

Once I was set on the Large, I went ahead and traced all the many (many) pieces and got started.
I decided to line the parka with a black crinkled nylon quilted fabric I'd also gotten from Mood a few years back.

And since the taffeta outer fabric and the quilted lining fabric are thin and not very warm, I decided to interline the whole thing with some pink poly fleece we used to cover our sofa with. It was badly pilled on the wrong side but perfectly usable. I'm pretty sure I'd purchased that at Metro Textiles.

Let the sewing begin! First I interlined all the pattern pieces individually and sewed the lining together.


For some reason the lining torso pieces are different from the outer torso pieces; the layers are just drafted differently. The sleeves are virtually the same. Each raglan sleeve is made up of three sections, and on the outer sleeve the center pattern is made up of three individual sections and gathered. You can sort of see how this looks in the muslin pic below. Ultimately I scrapped this feature: it didn't look good in my fashion fabric and it isn't necessary for mobility (I widened the center piece a little just in case).

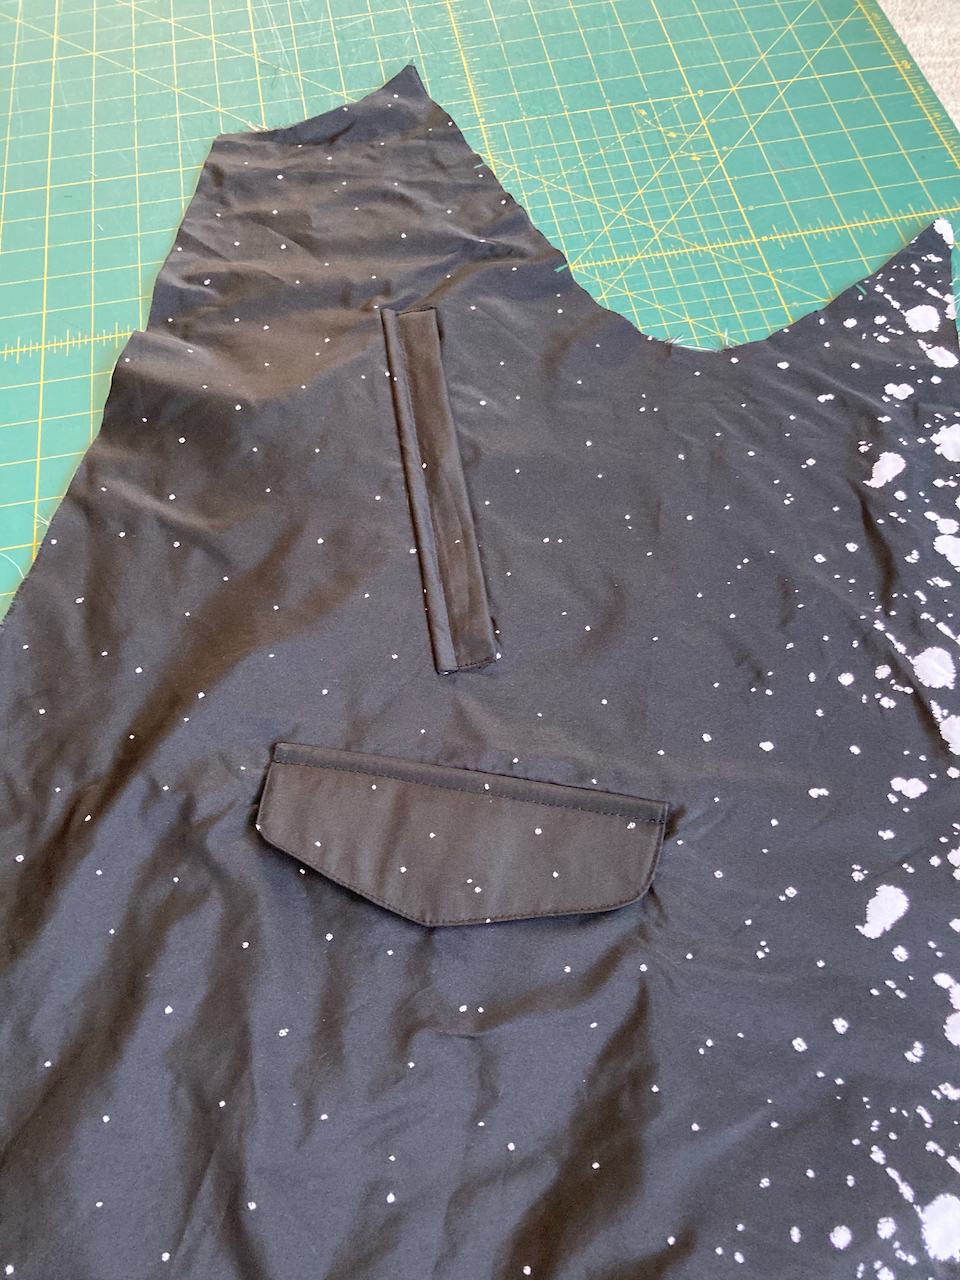
With my lining done, I now cut my fashion fabric. Below are the two fronts, side by side. As you can see, front left is mostly black and front right shifts from black to white. The back is just the opposite.

Cutting all the sleeve and hood pieces was time consuming and I made some mistakes, so it's a good thing I had extra panels. It was hard for me to wrap my mind around which side of the fabric I needed to cut and how to lay the pattern piece (up or down) so that the upward-facing side would end up how I wanted it.
In addition to making a muslin for fit, I also tested the various pockets since I wanted to make sure everything would work out before I cut holes in my fabric. I made a few minor changes. The two breast pockets in the original pattern have two snaps each. I thought opening and closing snaps just to use my pockets would be too hard on the fabric over time, so I substituted a zipper. The zipper is covered by an attached welt.

Once I had my fronts and sleeves finished, I went to work on my hood. The hood is deep (this is what's known as a snorkel-type hood) and has an extension onto which snaps a piece of lined fur trim. I bought a nice quality piece of long-hair black faux fur at Chic Fabrics last week. They were willing to sell me just half a yard.

The photo below from the pattern book shows the extension (where you see the snap), along with the fur piece, which can also be folded to the inside of the hood if desired. On the inside there are buttons for the little button loops you see on along the lined edge of the fur piece. Like I said earlier, this is a complicated pattern. (The green nylon piece with the Velcro on it is the top of the zipper shield on the right side of the coat. Notice too that the front zipper extends all the way up the hood and ends at the tip of the hood extension.)


I am far enough along with this project that I feel like I can see the proverbial light at the end of the tunnel. It has been a pretty long journey -- more than two weeks with maybe just one day where I didn't sew anything coat-related.
So far the pattern has worked out well: I've found a few minor mistakes but most of the errors have been my own.
The next big step is to sew the lining and the outer layer together, basically all in one long stitch line (I'm leaving the hem open and closing that up last), right sides together. Then the whole thing is turned right side out, followed by a lot of topstitching. Wish me luck!

Happy sewing, everybody!
NOTE: I post regularly about my projects on Instagram, so do follow me there if you don't already.
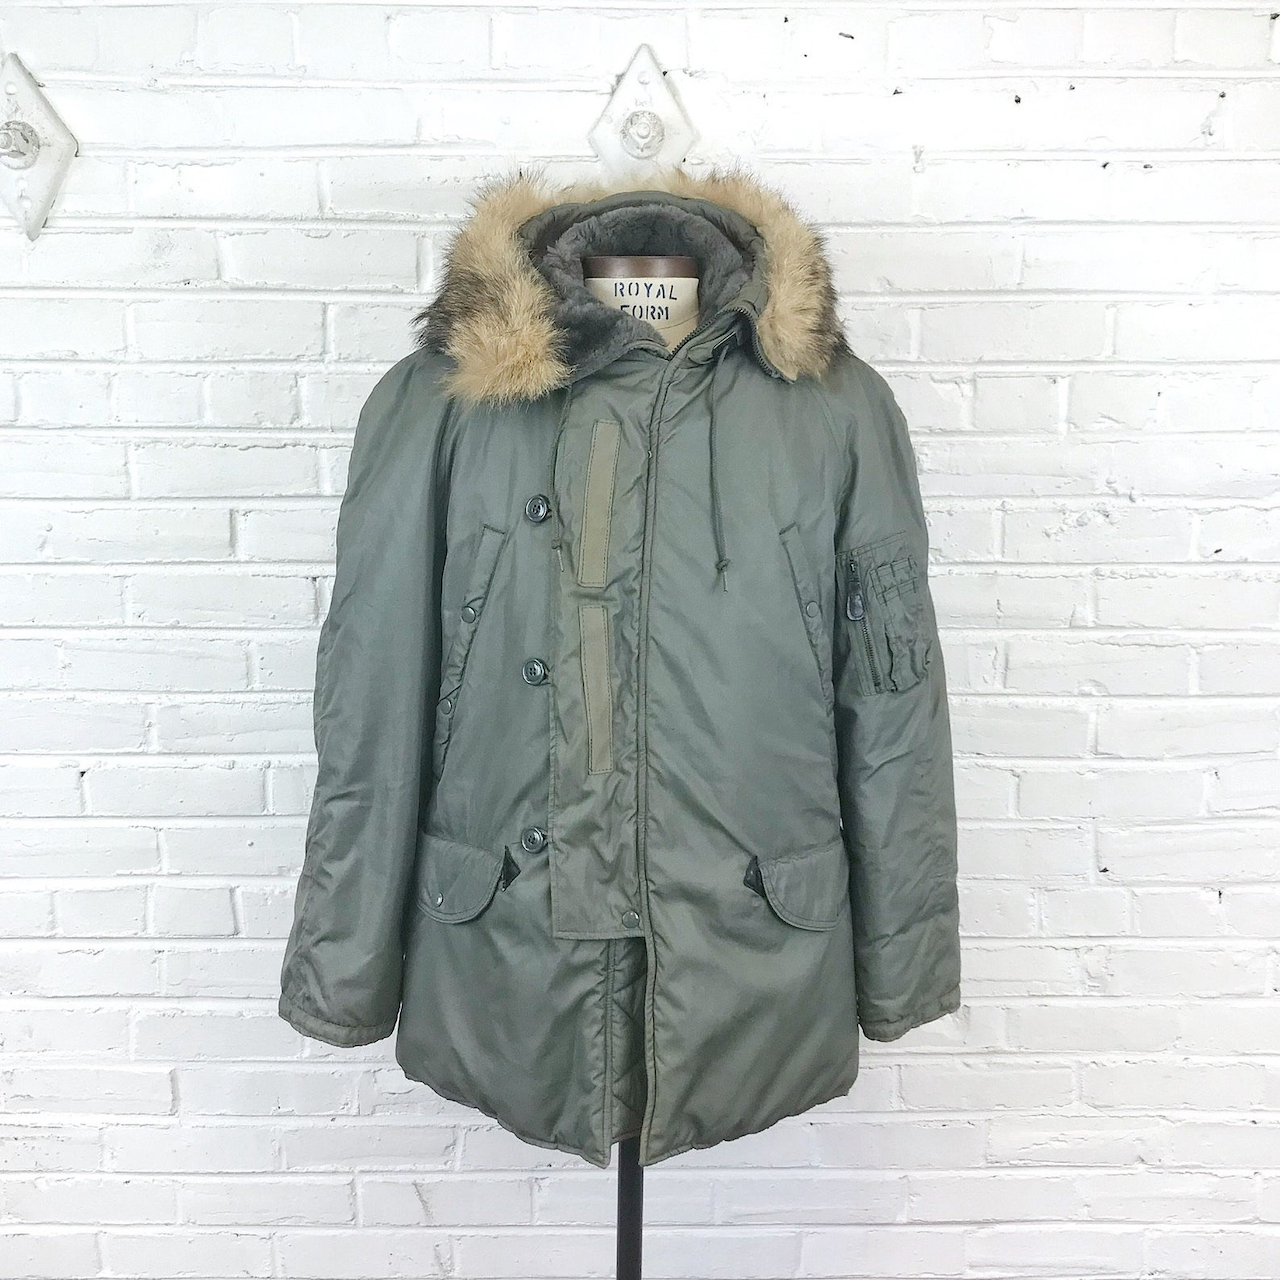 |
| This is what a standard N3-B parka looks like. |


I feel such a wimp now that I complain about tracing a burda pattern.... that pattern page looks far beyond me. Brilliant choice of fabric- its looks amazing
ReplyDeleteIt's gorgeous! Like snow caught mid fall, being blown in the wind!
ReplyDeleteLove it! well worth all the effort, I say.
ReplyDeleteWow! How fabulous this will be!
ReplyDeleteI admire your determination. I would have never started once I saw the pattern page! Yikes! This is a pandemic project for sure :o)
ReplyDeleteKathleen - kakingsbury at verizon dot net
FAB U LOUS!!!!!!!!!!
ReplyDeleteCan hardly wait to see you model the completed project....
ReplyDeleteI am in love with your fabric choice. Your parka is looking fantastic!
ReplyDeleteYIKES! Directions in Japanese. Pattern pieces overlapped. You are amazingly patient and skillful to attempt this project. I love the fabric choice which is reminiscent of a snowy day. You continue to outdo yourself, Peter.
ReplyDeleteDownload the Papago app. It transaltes the south-east asian languages such as Japanese.
ReplyDeleteIf I were constructing what looks like a fantastic jacket, I would leave an opening in the undersleeve lining and turn everything out from there. In fact, I usually leave both sleeve linings open to more easily bag the sleeve hems. When everything is bagged, close up the remaining sleeve opening with a short length of top stitching. Would this make things easier?
ReplyDeleteOMG very seriously impressive . I LOVE the pink pilled fleece interlining . Knowing that its there will keep you warm and make you laugh!!
ReplyDelete