

Classic versions of the N3-B military parka always have a small zippered pocket with a few additional small pocket openings on the upper left sleeve. I chose to leave these out since I didn't think I'd ever use them. Do you ever use a tiny sleeve pocket?

Notice in the above photos how the N3-B parka's pockets close with snaps. I was afraid that snaps would require too much pulling on the fabric to get the pockets open. I made two changes: on the lower pockets I substituted Velcro. In my experience a small piece of Velcro requires much less tugging on the pocket flap to get the pocket open. Less tugging means less wear on the fabric.

On the upper pocket, I eliminated snaps and I also changed the pocket construction. The pattern calls for a single welt covering the pocket bag opening. The welt is reinforced at either end as one would construct any welt pocket. Somehow I didn't think this would be strong enough, especially on a pocket I saw myself using a lot.
 |
So instead, I created a zippered opening and covered it with a narrow
flap that's anchored at each end so it resembles a welt (This is the
same type of pocket opening I used in my mountain parka, part of the
original Daisy Kingdom pattern.). In the pic below you can see what this upper pocket looks like.
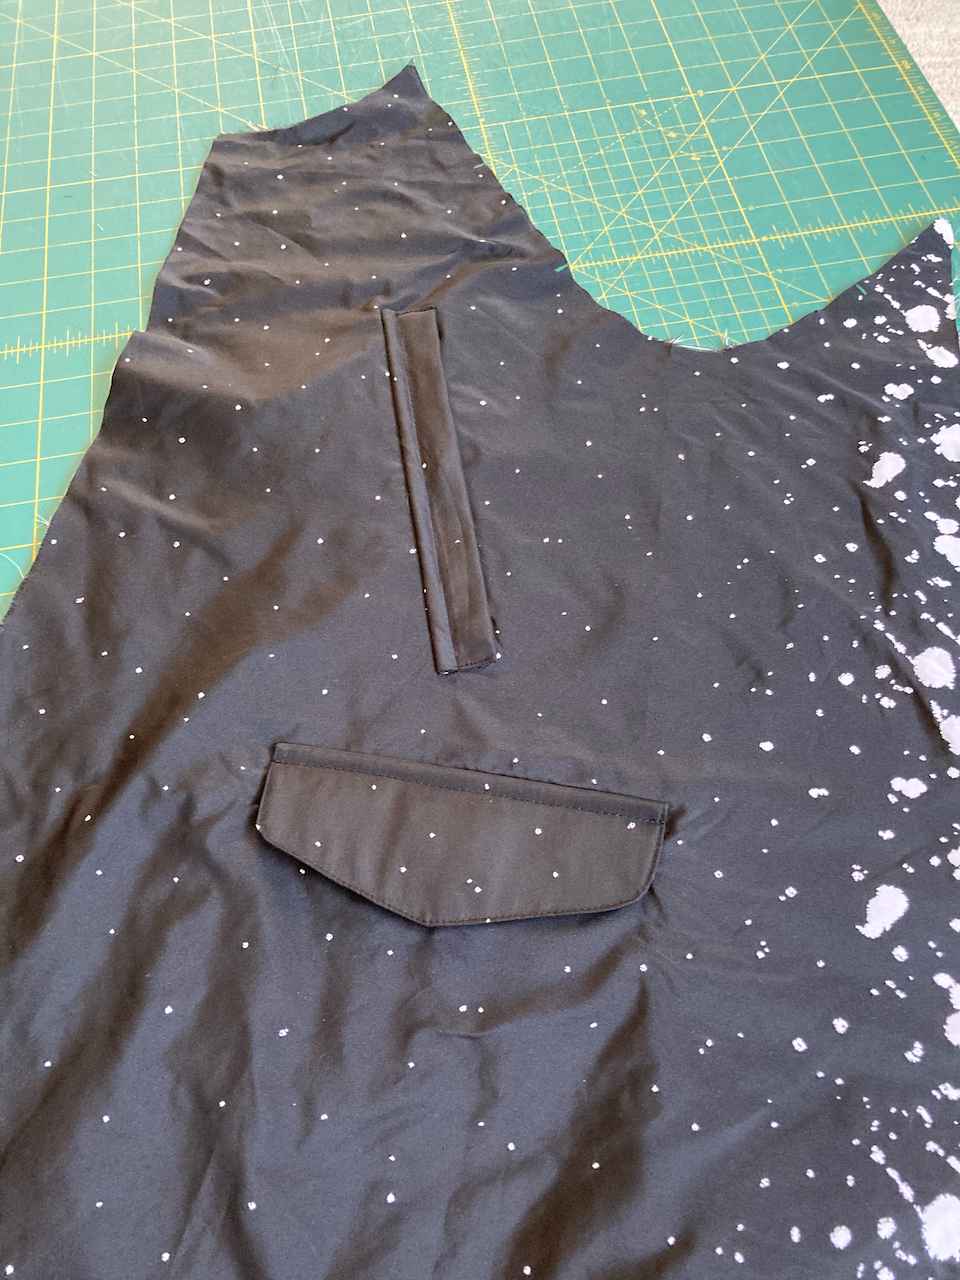
I cut a rectangular opening roughly the same size as my zipper. I completely faced the opening to reinforce it on all sides.


Note that on the right side of the coat, which has the white blotches, both upper and lower pockets, with their respective matching flaps, are virtually impossible to spot.
Another change I made to the parka was to extend the front zipper shield down to just a few inches above the finished hem. This is the way most commercial N3-B's are constructed, although my Japanese pattern book has the shield ending at the bottom of the zipper (see below). The opening as drafted allows a lot of cold air to potentially enter the parka. I also think it looks better longer.


Perhaps the most difficult part of the parka to construct was the hood. First, the many pieces of my fashion fabric had to match the black-to-white-and-back-to-black-again pattern of my coat pieces (more or less). I was also concerned that the scuba-type hood would be too deep and look strange. Here's what these hoods generally look like.


In the end I decided to just trust the pattern. I added the extension (with the snaps) to the main part of the hood and then created the lined fur piece that snaps onto it and flips inside the hood, where it attaches with button loops and buttons (if you choose to flip it in). Luckily I have experience working with faux fur as well as installing snaps.

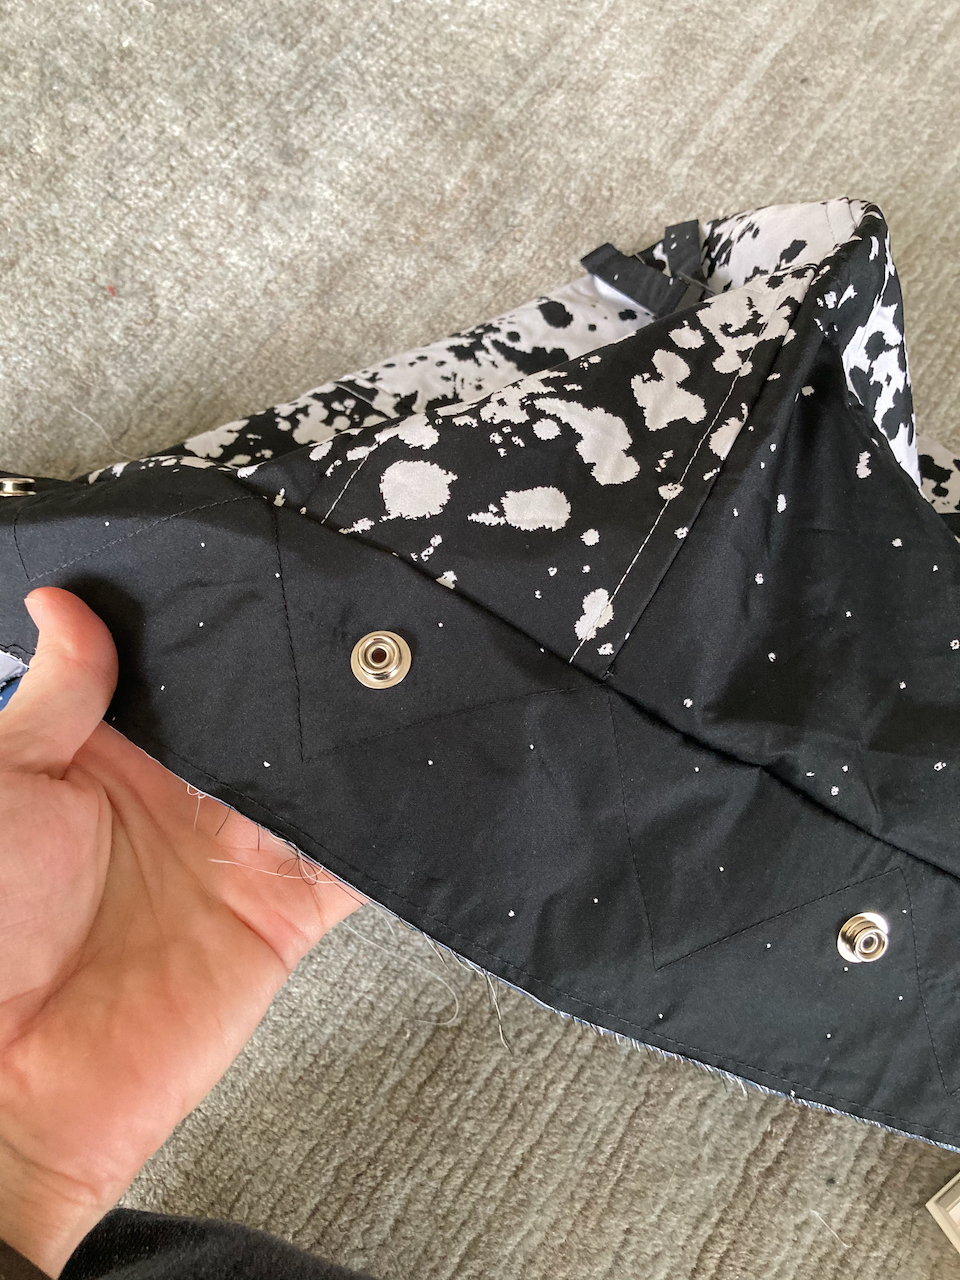


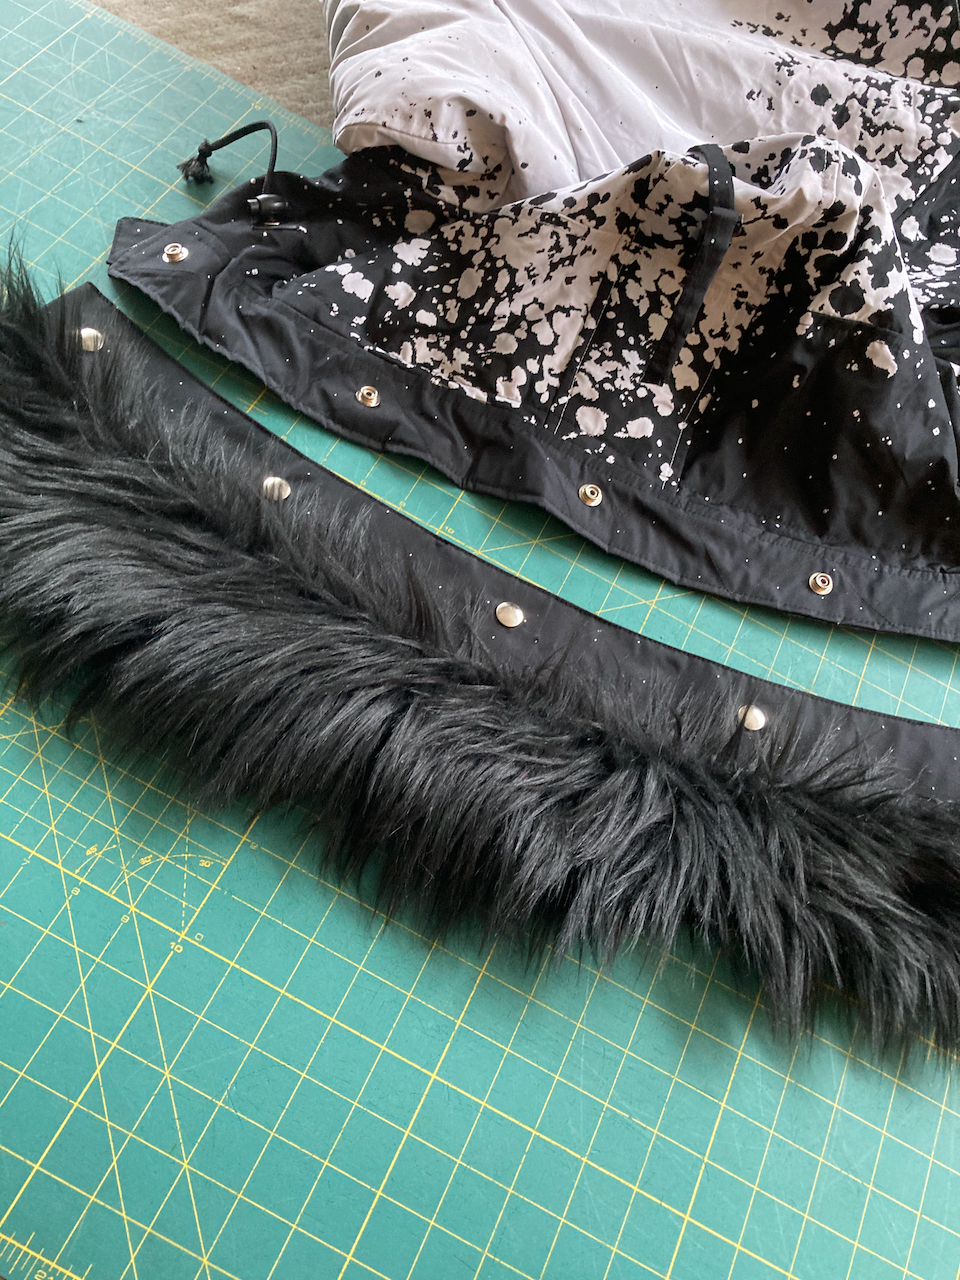
I am glad I went the whole way with this hood because the result really looks cool and the fur trim is easily removable. But it took me a couple of days to complete. Needless to say, all the individual pieces had to be underlined and reinforced in the snap areas to make sure the snaps held securely. Five button loops (made out of elasticized cording) and five buttons hold the fur piece to the inside of the hood. You can also let the fur flip out more, if you like that look, by simply skipping the buttoning on the inside of the hood.

Another minor change: I added two inner pockets below the waistline drawstring. You can never have too many deep pockets for things like sunglasses, phone, or wallet. These are simple lined patch pockets--nothing fancy. Oddly, there are no inner pockets in the original pattern.

Another challenge I had constructing this coat was the lining and interlining. The pattern is drafted to be interlined but not by poly fleece, which is very bulky. Twice I had to taper the lining-interlining somewhat. The sleeve was too bulky at first to fit comfortably in the outer fabric sleeve and, just before I hemmed the parka, I realized there was more lining width than coat width. I opened up the lining-interlining side seams, trimmed them roughly 1" each, and sewed them back together. I am lucky that I had that extra room to spare; the coat fits fine with the slightly narrower lining-interlining.

Part of the reason I couldn't entirely predict this challenge is that the lining uses different pattern pieces than the outer parka, with a narrower back piece and wider front pieces, placing the side seam of the lining-interlining in a different place than that of the outer parka. I'm not sure why that is but I suspect they simply copied the construction of a classic N3-B parka. I'm not sure if the issue was the pattern itself, the fabric I used, or simply inaccurate adding of seam allowances. I'll never know.
Usually when we sew, the lining is a lighter weight fabric than our outer fabric, which allows a little wiggle room if the lining is a little too full. Not so here: the double cloth jacquard I used is very lightweight but the lining-interlining is thick and more structured. In order to have the outer fabric hang smoothly, the lining-interlining layer had to be exactly the right size.
A few more details:
I picked up my outer buttons (there are five) at Daytona Trim. They are backed by smaller buttons visible from the inside of the parka, which help to anchor the larger button to the coat.


I could probably write a short book about the construction of this parka and fear I'm moving in that direction.
Stay tuned for the big reveal, coming soon!
Happy sewing, everybody!
PS - Read original 2014 post about this pattern book here.


Please tell us more about this Japanese pattern book. Pleeeeaaaase!
ReplyDeleteYou can read more about it in an earlier blog post here:
Deletehttp://malepatternboldness.blogspot.com/2014/11/i-splurged-for-new-mens-military-jacket.html
simply spectacular. And wonderful blow by blow.
ReplyDeleteLot of work but worth it. Crazy for that fabric. Really elevates a plain parka into a work of art.
ReplyDeleteAmazing! Your attention to detail is impressive.
ReplyDeleteWow!I love it Peter! What a work, but it was definitelly worth!
ReplyDeleteI am very happy to read your book about this parka. I've made three coats in the last two years, one that spanned the making of the other two, and I am always seeing more techniques and ideas for another one.
ReplyDeleteThis is just magnificent. Thanks thanks thanks
Wow, what a project! It's worthy of a book.
ReplyDeleteThere's one thing I think I'd have changed, and would have mentioned it earlier if I realized you were going to lengthen the zipper - I would have used a 2-way zipper. They prevent stress on the zipper bottom when you sit, as you can raise the lower slider. Also, you don't need to fold the front of the coat to avoid pulling that area. Unless the coat is big enough or you don't need to get in/out of cars every time you go somewhere, it's not an issue?
Such a fabulous parka!
ReplyDeleteIf you want to use snaps and are worried that the vigorous pulling will damage the fabric, try using Prym style snaps. They are the ones with a dimple that inserts into a similar sized hole, requiring just a tiny tug to open, and an easy push to close.
ReplyDelete