

I just finished my muslin, readers, and that little voice inside is already asking, Do we really have to do this all over again in faux fur?
I wasn't going to make a muslin at first, but since most of the major seams will be done hinge-seam style (more about that later), as per Kenneth King's instructions, I won't be cutting seam allowances. I wanted to make sure this coat was going to fit. Thankfully, it does, and there's a very comfortable amount of ease. I made this with some cheap, coarse purple cotton I had in my stash.
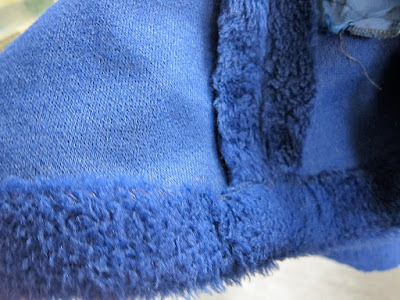
From the back, with undercollar up.

Collar down. I removed the back pleat.

Straight front without belt.

I only added the facing to the right side (which you see folded on top); on the left side you're just looking at the front piece only, but you get the idea. The only challenge was the notched collar -- if you've ever made one you know why: all those seams intersecting at that one little dot and all the careful clipping of seam allowances required.
I'm uncertain about the length the coat should be. Believe it or not, this is the intermediate length -- it could have been a maxi coat. I do love this pattern!

Meanwhile, I've amassed all my recommended tools, face mask included -- you don't want to inhale all those hair fragments and dust (Kenneth King recommends using one) -- and started experimenting with the fur. Below I am also armed with my hair clippers, which I'll use to trim seam allowances on the collar and facings; those won't have hinge seams.

Here are some of my other tools, including awl (that pointy, pin-like thing), afro pick and assorted combs, and cold tape.

The cold tape is a sturdy, highly adhesive fabric tape that's used to stay fur seams. It will be added to the top seam edges before I stitch. I found a roll at Greenberg & Hammer, the notions store, before they closed.

A basic seam is stitched right sides (i.e fur sides) together, with the reinforced seam on top. Before stitching, you use your pick to push as much fur as you can into the seam.
Then you zigzag along (falling slightly off) the edge, like overcasting, and gently pull the two sides apart so that the seam lies flat. ( I'm doing project this on my Kenmore 158.141, the one in the table.)

After a little combing, the seam is invisible from the front.

If you don't push the fur out of the seam first, you end up with something like this. Bad.

BTW, a regular straight stitched seam, without any trimming at all, would look like this -- a mess.

Of course, another necessary tool is a vacuum cleaner. Working with this fur creates a lot of loose hair along cut edges. Here's a seam allowance I shaved with my clippers. See all that hair? This is not a project for the anal compulsive.


My fur, while not the shaggiest out there, is much trickier to deal with than the plush fur in my Salvation Army coat from yesterday. Look how much shorter the nap is on that -- more like polyfleece.
Friends, if truth be told, I'm a little anxious about getting started but I'm trying to breath deeply (through my face mask, of course) and relax. It's not sable, after all.
A happy Friday to you all!


Wow - your practice seam looks amazing when you do it with the tape and all the shaving and such - you really can't see it from the outside. I also think the coat muslin looks great - I can't wait to see it all done up in the fur!
ReplyDeleteOK, that is WAY too much trouble. I can barely stand to shave my armpits (on occasion). (I know, TMI. Or European, you decide.)
ReplyDeleteThis from the woman who makes her own bras! ;)
Deletehmmm... i've always wanted to try to sew fake fur, but have always been hesitant... this post still has me sitting on the fence. :) really looking fwd to seeing your completed project! :)
ReplyDeleteThis looks like fun!
ReplyDeleteThe seam finish looks nice and flat, I must remember that trick - now that I have a machine that actually zig-zags!
And I'm glad to see that face masks are 'in' in the fashion capital - I am pleased to announce I wore mine yesterday too, however it was for sanding paint off the side of the house!
You are so very brave ... and so very patient ... but the results are worth it. I am not worthy.
ReplyDeleteP.S. – I really like the muslin!
Outstanding examples of what to do (and what NOT to do) with the seams.
ReplyDeleteCathy is going to stop motor vehicle AND foot traffic!
Now, with all of his knowledge, how do we get Senor King to run the free world?
I love that picture of you with the electric shaver AND a dust mask! ...oh and definitely need a vacuum cleaner...after I made my faux fur jacket it looked like I had massacred one of our cats in the room (only because both the fabric and our cats are black)--the faux fur was EVERYWHERE.
ReplyDeleteHow smart of you to have consulted Kenneth King! He knows all. It's going to be fun watching this coat emerge.
ReplyDeleteI am eager to see your faux fur coat - I just know Cathy will look absolutely stunning in it (as she always does). . . I do hate that girl!
ReplyDeleteThis is all really fascinating. I've never worked with faux fur before (and probably never will) so seeing the process is super informative. Thanks for going where most of us have never gone before!
ReplyDeleteI'm really excited that you're going to do fake fur. I've made a handful of such coats over the years, mostly with fur that has a much higher pile. I never trimmed the seams (and boy did my old chintzy machine balk at that!). Fake fur is pretty much a PITA. But cozy!
ReplyDeleteI am looking forward to seeing how you handle those deep cuts in the line of the collar, which could be very tricky. Perhaps you'll use that fancy faux suede backing to advantage?
You look like a teenage *sniggers* mutant ninja turtle ready to go all ninja on the faux fur. Now we just have to find an appropriate Renaissance artist to name you after LOL
ReplyDeleteIf you're unsure about the length, try the muslin on with the black sparkly outfit and see what looks best with that. Carry on, because this coat is going to be Fabulous!
ReplyDeleteI have a roll of tape that looks just like that and I use it for draping. I wonder if its the same thing.
ReplyDeleteDude, you look like you are scrubbed up for surgery with your face mask and all those tools laid out! LOL
ReplyDeleteSo...interesting seam construction, something I've never done before, and I am wondering it is really strong enough? What kind of thread do you use?
Final question: What will you do with the purple muslin? Finish it off and donate it to a shelter? Just wondering!