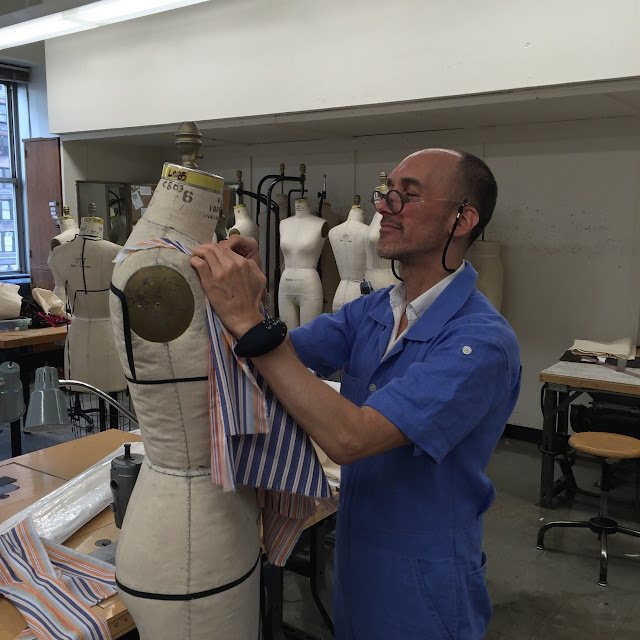
Readers, it's hard to believe it but I have only one more week (and a day) of draping class!
I've loved this class but I must admit that it moves so fast that I hardly remember what we covered the week before. Thank goodness for these blog posts so I can refresh my memory.
You may recall that last week we began draping a princess-seamed bodice of our own design. This week we added collars and sleeves. We followed flat-pattern methods for both (most sleeves are not draped), but we did drape the shape of our Peter Pan collar on the dress form. Here's mine:

Below you can view my princess-seamed bodice from the back. The center piece is supposed to be pinned atop the side piece (a correction I later made) -- apologies.

Next we designed sleeves for our bodice. I decided to create a half-circle sleeve and I did this using the sleeve sloper we all traced the first week of class, and the standard slash-and-spread method, instructions for which I found in my Helen Joseph-Armstrong patternmaking book.


 |
| I'm finding that many of my designs have a vintage feel. I wonder why.... |
Next, we draped a one-piece balanced sheath dress. Not creatively challenging but an important draping exercise since you're creating fish-eye darts front and back. This is the last garment we're draping as a class.


Yesterday, we began working on our final project, a dress sewn in a stripe, which we'll have to have completed in one week. Since I'm working with such a bold uneven stripe, I'm using my draped fashion fabric for inspiration rather than creating style lines on my dress form and trying to impose them on my fabric. I'm still not sure what this dress is going to be but I'm pretty sure that it will be cut on the bias, at least in part.


I'll probably skip the ruffles since this is really about draping, not embellishing.
And that's it! Our classroom time next week will be dedicated to sewing our final project. I'll play around with my fabric this weekend and see if any fresh ideas occur to me. One thing's certain: I'll miss this class when it's over; it's been a lot of fun.
Have a great day, everybody!






Thanks so much for sharing this journey with us! I love the bodice and that half-circle sleeve that you created. Can’t wait to see the final project. Personally, I’m glad you may skip the ruffles. Perhaps too busy with the stripes? But you’ve proven me wrong before!
ReplyDeleteThis is seriously impressive. One day I may take this class (just got to get through a few things first) :-)
ReplyDeleteI just came across something this week that said stripes cut on the bias should match at centre front with the point down, so I was curious whether the instructor had any comment on that, since I noticed yours point up!
ReplyDeleteThe downward arrow effect (pointing to the netherland, as it were) is ....always an unfortunate design element.
DeleteI'll wager matching the warp/weft on a bias center seam is why the stripes are supposed to go downwards (warp dominant?). I have a cheat chart for this on my cutting table wall, but ...no arrows for me. When in doubt, I point up. To my shining face.
I think they work in both directions.
DeleteMy two pennies worth. First off, I am not an artist of any sort.
DeleteI've seen diagonals both down and up. I seem to notice down is far more common. To my eye, down is better, not because it points to heaven, but rather that up makes the face seem to be sitting on a small point. Not good.
In the end, the face is the most important body element there is. Even when a person is standing naked in front of a very grateful lover, the lover STILL watches the face 95% of the time. That is because the emotions show on the face in an instant and ongoing basis. There is nothing more incredible than watching a lover's face contorted in ecstasy from a distance of six inches.
The downward arrows forms a cup above to make the face the Center of The Universe.
Just my two pennies worth.
https://www.pinterest.com/pin/261490322092990975/
DeleteI've really enjoyed your draping posts. Love your blouse pattern that is one I would definitely make.
ReplyDeleteI really enjoy reading about the classes you take. Thanks for posting about them!
ReplyDeleteAs to that "vintage feel", Peter Lappin, your wonderment has a decided reek of the tongue-in-cheek.
ReplyDeleteYou have been unduly influenced by a certain someone of a west coast origin, and THAT blouse muslin appears to be a pattern you'll be sending her way (I know what you are up to mister man!!!).
Aww! I'm feeling nostalgic about the draping class I took at FIDM about 14 years ago! Omg, I can hardly believe it's been that long! Good times! :)
ReplyDeleteI know what you mean about missing the class. While you look forward to getting a break from all of the work (at least for me) you also miss the camaraderie of the class. Will you be taking Draping II?
ReplyDeleteProbably -- that and Tailoring II.
DeleteI would love to see the Peter Pan collar mimic the curves of the plastron princess seam... Just saying. :)
ReplyDeleteWow, so impressive! I can't wait to see the finished project of the striped fabric. I have often thought of learning to drape, this is pretty inspiring... and I like the photo from HJA's book, I have the same edition and I loooove those retro illustrations! <3
ReplyDeleteWow, Peter! It is all very impressive! What you are doing with the stripes is beautiful. Thank you for sharing this experience with us.
ReplyDeleteThis is just awesome! I just started taking seewing classes, and draping is not on the programme for quite some time. But looking at this, I can't wait to get into it!
ReplyDelete